Picture this: you’re enjoying a romantic dinner with flickering candles when disaster strikes. Hot wax drips onto your favorite tablecloth, favorite dress, or that beautiful upholstered chair. Your first instinct? Scrub frantically. But that’s exactly the Wrong approach that can permanently damage your precious fabrics.
The truth is, removing candle wax from fabric doesn’t require aggressive scrubbing, expensive cleaning Products, or professional intervention. There’s a surprisingly simple Method that works like magic, and it’s probably using items you already have at home. The Secret lies in understanding the physics of wax and working with it, not against it.
The Science Behind the Perfect Wax Removal
Candle wax hardens when it cools, creating a solid barrier that seems impossible to remove. Most people make the mistake of trying to scrape it off while it’s still warm and pliable, which only pushes the wax deeper into the fabric fibers. The key is to let the wax cool completely first, then use controlled heat to reverse the process.
The Method That transforms this frustrating chore into a satisfying solution involves the strategic use of temperature changes. When wax is heated just enough, it transitions back to its liquid state Without the violent splattering that caused the mess in the first place. This controlled melting allows you to absorb the liquid wax safely and completely.
Professional cleaners have known this technique for decades, but it remains surprisingly unknown to most Homeowners. The process works on virtually any fabric type, from delicate silk scarves to heavy cotton upholstery, making it universally applicable for any household accident.
The Step-by-Step Foolproof Method
Start by allowing the wax to cool and harden completely. This might feel counterintuitive when you want to clean up immediately, but patience here prevents a much bigger mess. Once hardened, gently scrape off as much surface wax as possible using a butter knife or credit card, being careful not to press too hard against the fabric.
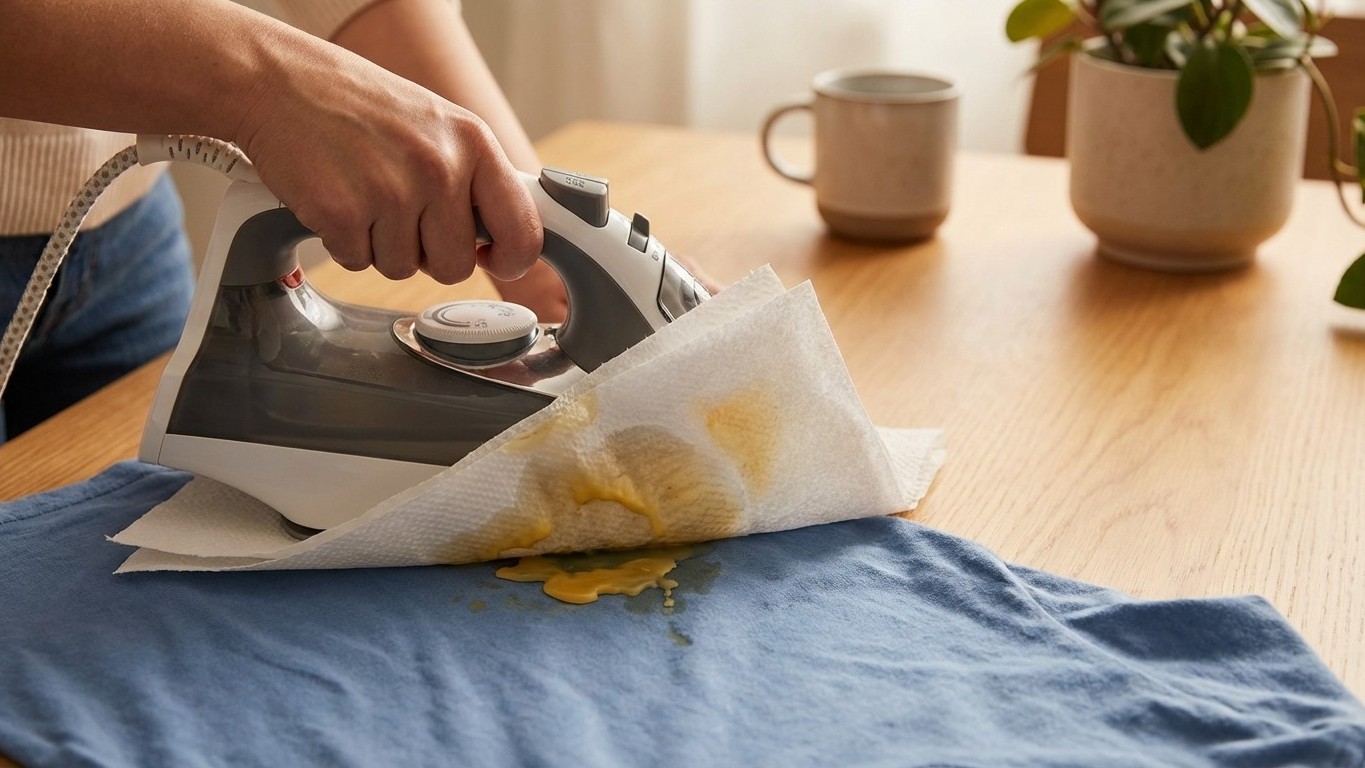
Next, place several layers of paper towels or brown paper bags over the remaining wax stain. The absorbent material is crucial because it will soak up the liquefied wax. Avoid using newspaper, as the ink can transfer to Your fabric and create an additional stain to deal with.
Set your iron to a medium heat setting without steam. The temperature should be warm enough to melt the wax but not so hot that it damages your fabric. Test on an inconspicuous area first if you’re unsure about your fabric’s heat tolerance.
Press the iron gently over the paper towels for 10-15 seconds at a time. You’ll see the magic happen as the wax melts and gets absorbed into the paper. Move to fresh sections of paper towel as they become saturated with wax. Continue this process until no more wax transfers to the paper.
Tackling Stubborn Residue and Different Fabric Types
Sometimes, especially with colored candles, a slight stain or residue might remain after the bulk of the wax is removed. Don’t panic and don’t start scrubbing aggressively. Instead, treat any remaining residue with a small amount of dish soap or laundry detergent, working it gently into the fabric with your fingers.
For delicate fabrics like silk or wool, reduce the iron temperature and use additional layers of protective paper. The process takes Longer but prevents heat damage. For heavy fabrics like denim or canvas, you can use slightly higher heat and may need several rounds of the paper towel technique.
Upholstered furniture requires special attention because you can’t throw it in the washing machine afterward. Work in small sections and be extra careful with the iron temperature. Consider placing a thin cloth between the iron and the paper towels for added protection.
Prevention and Final Care
After successfully removing the wax, launder washable items as usual. The heat and absorption method typically removes 99% of the wax, leaving no lasting damage or stains when done correctly. For items that can’t be washed, a final gentle brushing or vacuuming can remove any tiny wax particles that might remain.
This technique works so well because it mimics the professional methods used by dry cleaners and restoration specialists. The controlled application of heat, combined with immediate absorption, prevents the wax from re-solidifying elsewhere or penetrating deeper into the fabric structure.
Prevention remains your best strategy for the future. Use candle holders with wide bases, keep candles away from high-traffic areas, and trim wicks to prevent excessive dripping. But when accidents happen, you now have the knowledge to handle them with confidence rather than panic. No more frantic scrubbing required – just patience, the right technique, and trust in the process that has saved countless fabrics from the donation pile.