Drilling into walls is a common task for DIY enthusiasts, whether it’s to hang a picture frame, mount a shelf, or install a TV bracket. However, a prevalent mistake, over-drilling, can lead to significant wall damage, turning a simple project into a costly repair. Understanding this error and learning how to prevent it is Essential for maintaining the integrity of your walls.
Key takeaways
- Are you making a hidden drilling error that damages your walls?
- Discover the unexpected risks lurking behind simple DIY projects.
- Learn expert strategies to drill safely and protect your home.
Understanding Over-Drilling
Over-drilling occurs when the drill bit penetrates too deeply into the wall, potentially breaching the other side or damaging internal structures. This mistake is particularly common among DIYers who may not be aware of the wall’s thickness or the presence of hidden utilities. The consequences can range from unsightly holes and weakened wall integrity to more severe issues like puncturing electrical wires or plumbing pipes.
Common Causes of Over-Drilling
Several factors contribute to over-drilling:
– **Lack of Depth Control:** Without a clear understanding of the required hole depth, it’s easy to drill too far.
– **Inappropriate Drill Bits:** Using the wrong type or size of drill bit can lead to excessive penetration.
– **Unawareness of Wall Composition:** Different wall materials require different drilling techniques. For instance, plasterboard is more susceptible to damage than brick or concrete.
– **Hidden Utilities:** Drilling without checking for electrical wires, plumbing, or gas lines can result in dangerous and costly Mistakes.
Preventing Over-Drilling: Best Practices
To avoid the pitfalls of over-drilling, consider the following strategies:
1. Measure and Mark Accurately
Before drilling, determine the exact depth required for your anchor or screw. Use a pencil to mark the drilling spot and, if possible, indicate the desired depth on the wall.
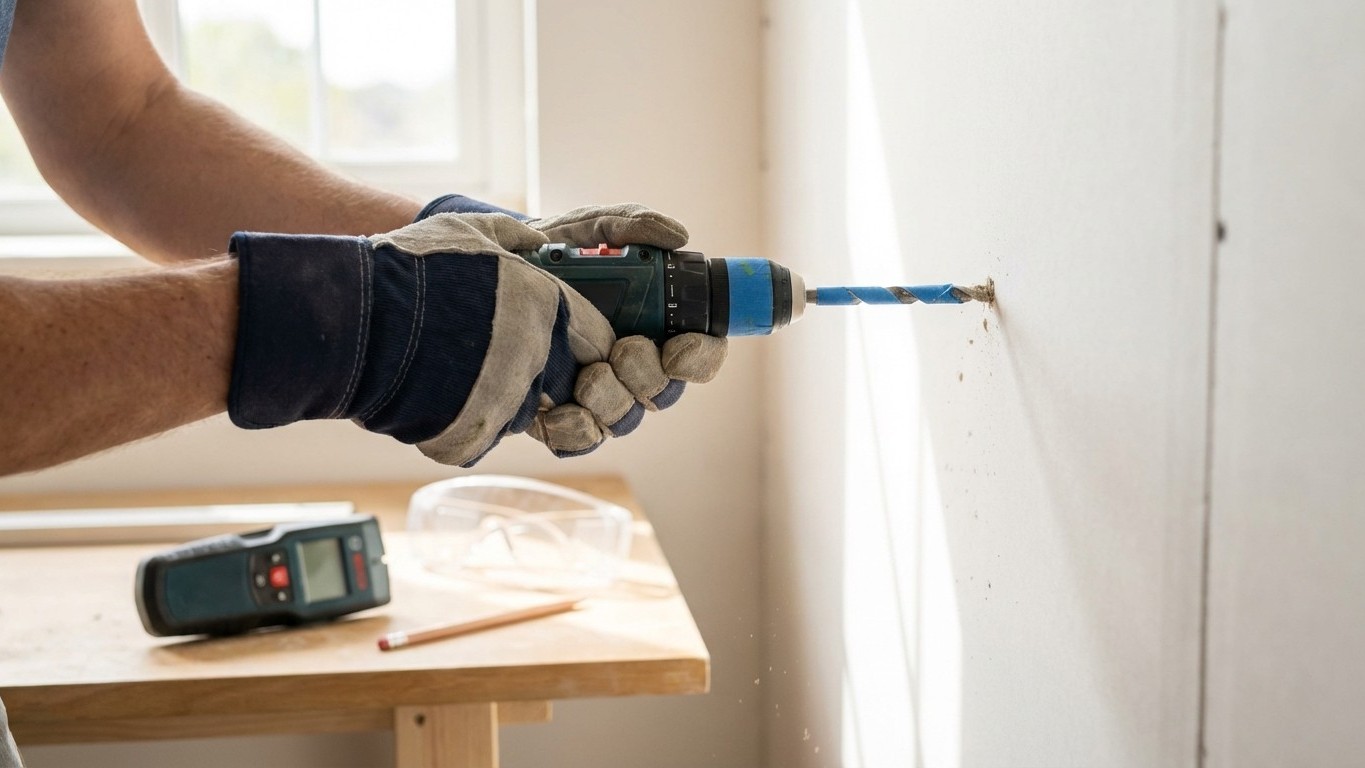
2. Use Depth Stops or Tape
Many drills come equipped with depth stops, adjustable collars that prevent the bit from going deeper than intended. If your drill lacks this feature, a simple trick is to wrap masking tape around the drill bit at the desired depth. This visual marker helps you stop drilling at the right moment. As noted in a recent article, “By wrapping masking tape around a drill bit at a desired point, DIYers can easily control the depth of the hole being drilled.” ways to use masking tape while drilling
3. Select the Right Drill Bit
Choose a drill bit appropriate for the wall material. For example, use masonry bits for brick or concrete and wood bits for wooden walls. Using the correct bit ensures efficient drilling and reduces the risk of over-penetration. An expert advises, “A multi-purpose drill bit is typically fine for drilling into plasterboard… However, it’s important to avoid using masonry drill bits at all costs, as they are too strong and will damage your plasterboard.” drilling into plasterboard
4. Drill Slowly and Steadily
Apply gentle pressure and drill at a controlled speed. This approach allows you to monitor the depth more effectively and prevents the drill from slipping or causing unintended damage. As highlighted in a guide, “It’s important to drill slowly and not apply too much pressure to avoid cracks.” drilling into plasterboard
5. Check for Hidden Utilities
Before drilling, use a stud finder or a multi-detector to locate studs, electrical wires, and pipes. This precaution helps you avoid drilling into hazardous areas. A safety tip emphasizes, “Use a stud sensor… This will tell you where the studs are in a wall if you need to drill into it.” drilling mistakes
6. Reinforce the Drilling Area
Placing a piece of masking tape over the drilling spot can help prevent the wall surface from chipping or cracking, especially on painted or delicate surfaces. This simple step adds stability to the area being drilled. An article notes, “Applying a piece of masking tape over the drilling point on a painted wall helps prevent chipping and cracking around the hole.” ways to use masking tape while drilling
Addressing Over-Drilling Mistakes
If you realize you’ve drilled too deeply, don’t panic. For minor over-drilling, you can use wall anchors designed to expand and fill the extra space, providing a secure hold. In cases where the hole is too large, filling it with a suitable filler, sanding it smooth, and repainting can restore the wall’s appearance. For significant damage or if you’ve hit a utility line, it’s advisable to consult a professional to assess and repair the issue safely.
By adopting these practices, you can confidently tackle your DIY projects without compromising your walls’ integrity. Remember, taking the time to plan and execute your drilling tasks carefully preserves your home’s aesthetics. Also, ensures safety and durability in your installations.