Every seasoned gardener knows that one neighbor who somehow harvests ripe, juicy tomatoes while everyone else is still nursing green fruit. The secret isn’t a special variety or expensive greenhouse—it’s an almost Forgotten Technique that our gardening predecessors mastered generations ago. In the northern part of West Virginia and in the higher altitudes the tomato seed should be sown from the first to the fifteenth of March, but in the southern part and along the Ohio and Kanawha Rivers the seed may be sown as early as February fifteenth.
These old-timers understood something modern gardeners often overlook: you don’t need to wait for perfect spring weather to start your tomato seeds. With the right protection and techniques, February becomes prime planting time, giving you a significant advantage over conventional timing.
The Traditional Hotbed: Nature’s Heating System
The cornerstone of early tomato success was the traditional hotbed, a brilliantly simple system that harnesses decomposing organic matter to create warmth. The best method of starting the plants is by use of a hotbed. It may be constructed as follows: Select a well-drained location where the bed will be sheltered, preferably on the south side of a building or fence. Dig a pit 3 feet wide by 6 feet long and 2 feet deep, so that the long side faces the south. Fill the pit with fresh horse manure well packed down by tramping.
This underground heating system was remarkably effective. The basis for the heat source is a thick layer of manure that will decay and give off heat as a by-product of microorganism activity. The heavy concentration of bacteria and fungi organisms in the decaying manure gives off carbon dioxide and heat. The heat rises through the planting medium, heating it and the air inside the hotbed. Modern gardeners can adapt this concept using compost or even electric soil heating cables for a similar effect.
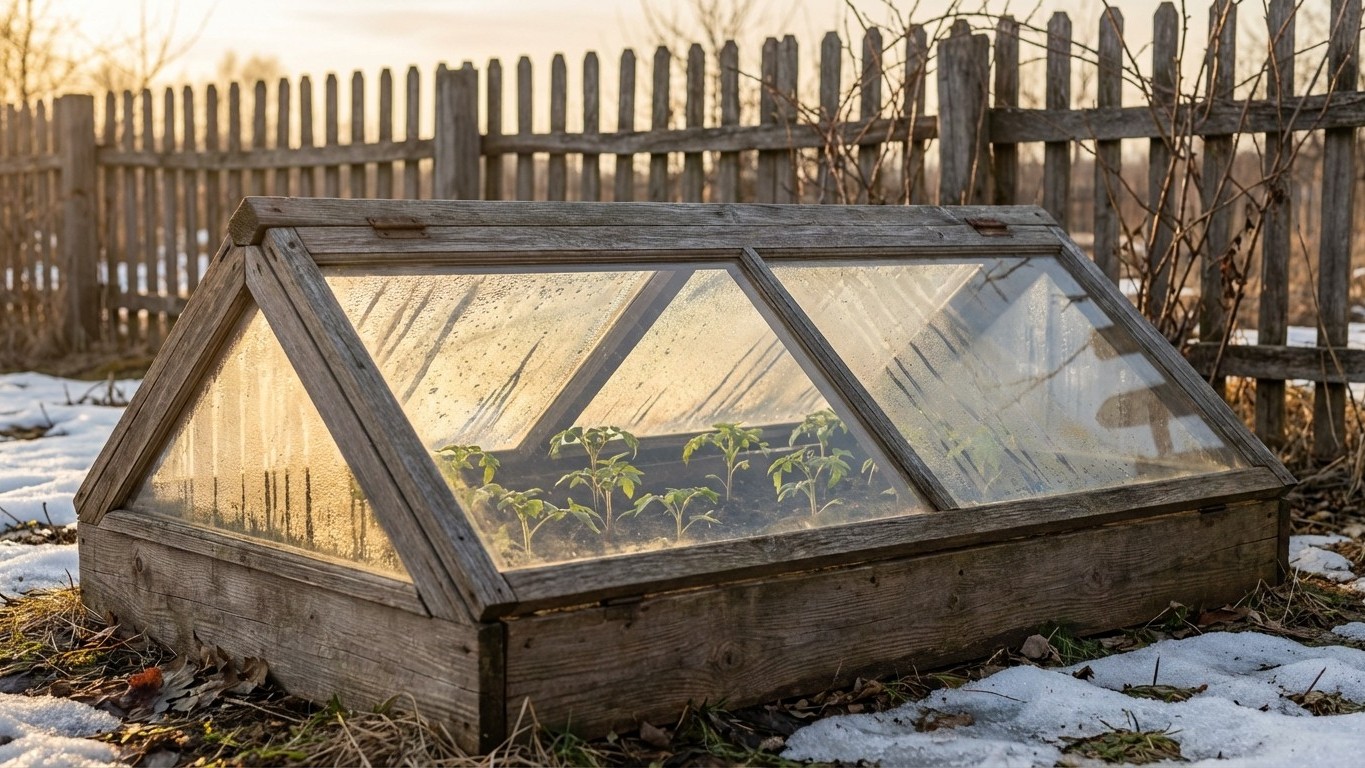
The construction required careful attention to orientation and insulation. Construct a frame 3 feet wide by six feet long. Have this frame 12 inches high at back or north side and 6 inches high at the front or south side. Place the frame over the pit and bank the outside with strawy manure or soil. Place in the frame four or five inches of good garden loam which has not grown any diseased plants. Cover the bed with glass hot-bed sash. This slanted design maximized sun exposure while the banked sides provided crucial insulation.
The Modern Milk Jug Revolution
While hotbeds require significant setup, today’s gardeners have discovered an ingenious adaptation that achieves similar results with household items. A terrific method for starting seeds that can be done earlier is milk jug winter sowing, which is basically sowing seeds in a milk jug that becomes a mini greenhouse. This is a low-maintenance way to start seeds earlier than you Thought possible. The sealed jug acts as a greenhouse that allows the seeds to germinate several weeks ahead of direct sowing.
The milk jug method brilliantly mimics the protective environment of traditional cold frames. The milk jug acts as a miniature greenhouse, providing a protected place in which your seeds can germinate and grow outdoors from mid-late Winter until spring. It’s a simple, inexpensive and low maintenance seed starting method that is said to produce stronger, more resilient seedlings that don’t require hardening off. Sowing seeds in a milk jug greenhouse mimics these conditions and also adds some distinct benefits. Using this method, your seeds can germinate and start growing weeks before any direct sowing can be done.
Setting up these mini-greenhouses requires minimal investment. Cut a gallon milk jug around its middle, leaving a hinge near the handle. Add drainage holes to the bottom, fill with 3-4 inches of seed-starting mix, plant your tomato seeds, and seal with duct tape. Once you have sown your seeds, tuck them into a crate or somewhere where they will be safe from wind but still receive good sunlight and element exposure. The natural cycle of the late winter and early Spring temperatures and snow or rain, will automatically germinate your seeds and begin the process of seedling growth. As the day temperatures begin to warm, be sure to check on your seeds and open the lids during days with temperatures of 50°F or above.
Strategic Timing and Variety Selection
Successful early tomato growing isn’t just about protection—it’s about understanding timing and choosing appropriate varieties. Every year, I would start a little later than last year to find that it was much better. In the end, we had healthier seedlings and better, earlier harvests. Even though many gardeners still like to start very early, starting seeds indoors 3 to 4 months before the last frost day does not usually result in earlier and healthier tomatoes.
The key is selecting varieties specifically bred for early production. If you live where the weather is already warm, step 1 is all you need for early tomatoes. Try Early Girl (50 days), Bush Early Girl (54 days), Juliet (60 days), Celebrity (65 days), Husky Cherry Red (65 days), or Super Sweet 100 (65 days). These determinate varieties mature quickly and can withstand the temperature fluctuations of early season growing.
Modern research supports the old-timers’ approach of patient timing. Research shows that the age of a tomato plant at transplant matters. A 2013 study found that seedlings with 7-8 leaves at transplanting produced 26% more fruit than tomato seedlings transplanted at 5-6 leaves, and that tomatoes started producing earlier when transplanted with at least 7 leaves. This validates the wisdom of starting early but transplanting at the optimal growth stage.
Protection Strategies for Success
Beyond proper starting techniques, old-timers knew that protection was essential throughout the early growing period. You can online-order commercial items such as Wall-O-Water or row cover fabric to provide cold protection for tomato plants set out early. You also can make your own protection by simply cutting the bottom out of a plastic gallon milk jug and placing it over the plant until the weather warms. (Be sure to remove the cap on top for ventilation.) Place a stake by the plant and slip the jug over the stake to keep it from blowing off.
The traditional approach emphasized gradual acclimation. During summer days ventilate by raising the cover a few inches on the side opposite the wind. Toward evening close the sash in order to get the bed warm before night. As the plants grow older the ventilation may be increased. Water in the mornings on bright days only. Keep the bed moist but not wet. Ventilate after watering in order to dry off the plants. This careful management prevented shock while building plant resilience.
The beauty of these time-tested methods lies in their accessibility. Whether you choose the traditional hotbed approach, embrace the modern milk jug technique, or combine both strategies, you’re tapping into generations of gardening wisdom. A cold frame can add 10 to 25 degrees to the outdoor temperature depending on the weather and the type of frame. Even a modest increase in soil and air temperature inside a cold frame can extend the growing season for most Vegetables-after-discovering-they-regrow-from-scraps”>vegetables from 4 to 6 weeks both in spring and fall.
Start gathering your materials now—whether that’s planning a traditional hotbed for next year or collecting milk jugs throughout winter. By February, you’ll be ready to join the ranks of those enviable gardeners who harvest tomatoes while their neighbors are still transplanting seedlings. The secret isn’t magic; it’s simply rediscovering the practical wisdom our predecessors knew all along.