Strip away tiles without hammering. Skip the concrete mixer. Transform-your-garden-into-a-pollinator-paradise”>Transform your kitchen or bathroom in a weekend rather than weeks. This approach has quietly revolutionized how homeowners tackle surface renovation, offering results that rival traditional methods at a fraction of the cost and chaos.
The “sensation method” isn’t marketing speak, it’s a systematic approach using specialized adhesive films and coatings that bond directly over existing surfaces. Think of it as high-tech contact paper that performs like ceramic tile. Professional contractors discovered this technique years ago for commercial spaces where downtime equals lost revenue.
Sarah Mitchell learned this firsthand last spring. Her 1970s bathroom featured avocado green tiles that seemed welded to the walls. Traditional renovation quotes started at $8,000 and promised three weeks of construction dust. Instead, she spent two days applying architectural-grade vinyl films and protective topcoats. Total cost? Under $600.
Key takeaways
- What if you could replace tile without touching a hammer or mixing concrete?
- One homeowner saved $7,400 and 19 days by choosing an unexpected alternative
- The three material categories professionals have been quietly using for years
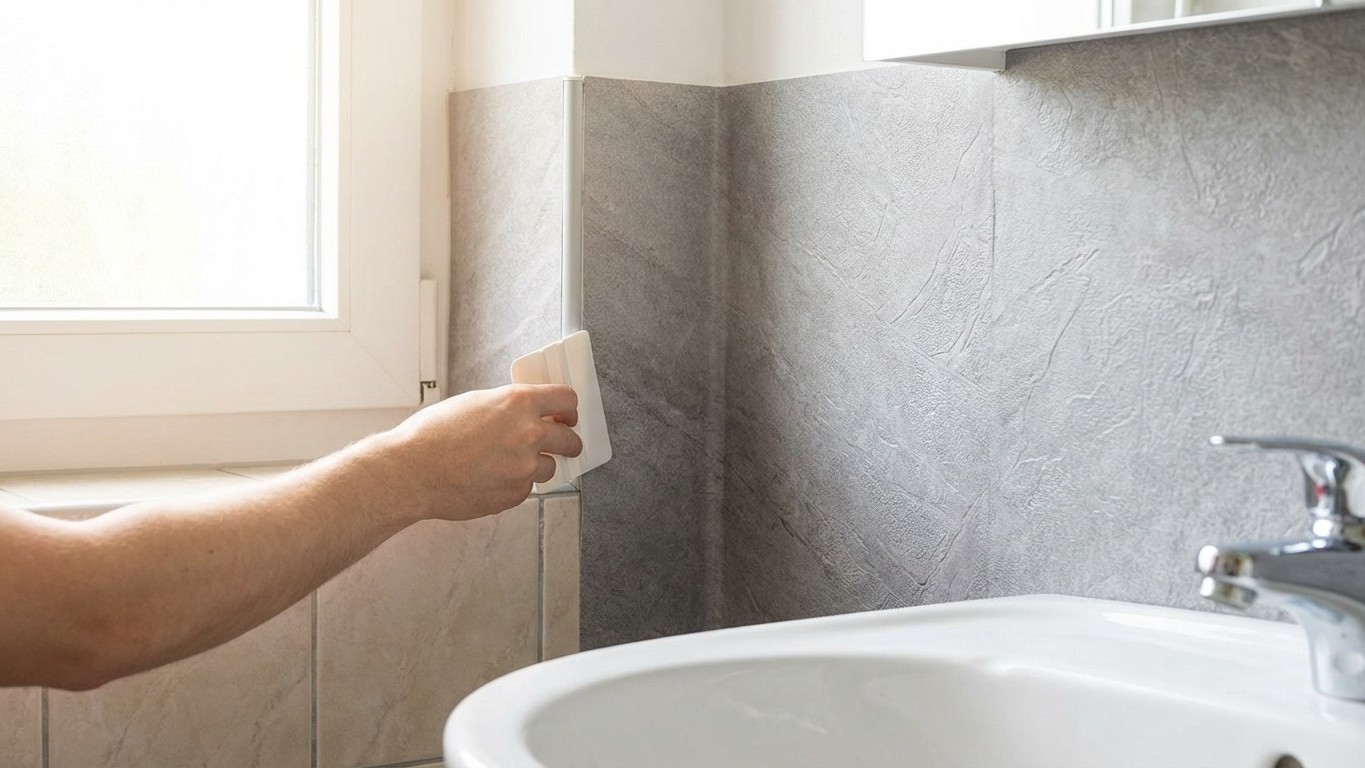
Understanding the Core Materials
Three product categories dominate this renovation approach. Adhesive architectural films replicate natural stone, ceramic, or wood grain with photographic precision. These aren’t your grandmother’s shelf liners, modern versions feature embossed textures and multi-layer construction that mimics authentic materials down to the grout lines.
Liquid surface coatings represent the second option. These epoxy-based formulations bond chemically with existing surfaces, creating waterproof barriers tough enough for commercial kitchens. Applied in thin layers, they cure into glass-smooth finishes available in hundreds of colors and patterns.
Composite overlay systems combine both approaches. A base adhesive layer bonds to your existing surface, followed by decorative elements and protective topcoats. Professional installers favor this method for high-traffic areas, though ambitious DIYers achieve excellent results with proper preparation.
The Step-by-Step Process
Surface preparation determines Everything. Clean thoroughly with degreasing agents, then sand glossy finishes to improve adhesion. Fill cracks and holes with appropriate compounds, this base layer will show through your finished surface if ignored. Temperature matters too. Most adhesives require ambient temperatures between 65-75°F for proper curing.
Measurement and cutting demand precision. Professional-grade films cost $15-30 per square foot, making waste expensive. Create paper templates first, especially around fixtures and corners. Mark your cuts on the backing paper rather than the decorative surface to avoid visible scratches.
Application technique separates amateur from professional results. Work in sections, using squeegees to eliminate air bubbles as you progress. Start from the center and work outward, trapped air will naturally migrate to edges where it’s easily expelled. For corners and curves, heat guns make films more pliable, though hair dryers work for smaller projects.
Sealing completes the transformation. Edge treatments prevent moisture infiltration that could compromise adhesion over time. Silicone caulk works for most applications, though specialized sealants offer superior longevity in wet areas.
Comparing Costs and Longevity
Numbers tell a compelling story. Traditional tile renovation typically costs $25-50 per square foot including labor, materials, and disposal fees. Quality adhesive films range from $8-20 per square foot, with installation tools adding another $100-200 to your project budget.
Labor savings amplify these differences. Professional tile installation requires skilled tradespeople charging $50-80 per hour. Most homeowners complete film installation themselves over a weekend, though learning curves vary by project complexity.
Longevity expectations need realistic grounding. High-quality films maintain appearance and adhesion for 10-15 years under normal residential use. That compares favorably with ceramic tile, which theoretically lasts decades but often requires grout maintenance, resealing, and individual tile replacement due to cracking or damage.
Maintenance proves surprisingly straightforward. Most films clean with standard household products, requiring no special treatments or professional services. Damaged sections can be replaced individually without affecting surrounding areas, try that with traditional tile installation.
Avoiding Common Pitfalls
Temperature and humidity fluctuations cause the most installation failures. Adhesives behave unpredictably in extreme conditions, leading to poor bonding or visible seam separation. Schedule installation during stable weather periods and maintain consistent indoor climate during curing.
Substrate compatibility requires careful attention. Not all existing surfaces accept adhesive films equally well. Textured surfaces may require smoothing compounds, while certain paints or finishes might need primer coatings for proper adhesion.
Edge details separate professional-looking results from obvious DIY jobs. Exposed film edges collect moisture and debris, eventually peeling away from the surface. Plan your layout to minimize visible edges, and invest time in proper edge sealing techniques.
Quality variations exist across product lines. Budget films might save money upfront but fail prematurely under moisture exposure or normal wear. Research manufacturer warranties and user reviews before committing to specific products.
This renovation approach won’t suit every situation or aesthetic preference. But for homeowners seeking dramatic transformation without traditional renovation headaches, these methods offer compelling alternatives. The real question isn’t whether this technique works, it’s whether it fits your specific needs, timeline, and expectations for your space.