Forty-eight hours. That’s how long it took me to Transform a dated 1990s kitchen into something that looked straight out of an interior design magazine. The total cost? Under £400. The secret wasn’t some magic trick or hidden inheritance. It was simply knowing where to invest every penny for maximum visual impact.
Kitchens are notoriously the most expensive rooms to renovate. A full remodel can easily set you back £15,000 to £30,000. But here’s what the renovation industry doesn’t want you to know: 80% of a kitchen’s visual appeal comes from elements you can change for less than 5% of that budget. Paint, hardware, lighting, accessories. These are the levers that actually matter.
Whether you’re preparing a property for sale, tired of staring at oak cabinets from the Blair era, or simply want a fresh start without the financial hangover, this guide breaks down exactly how to achieve a stunning budget kitchen makeover. Real techniques, actual costs, no fluff. Let’s get into it.
The Foundations of a Successful Budget Kitchen Makeover
Setting Your Budget and Priorities
Before touching a single paintbrush, grab a coffee and make an honest assessment. What specifically bothers you about your kitchen? Write it down. Is it the colour of the cabinets? The cheap-looking handles? That fluorescent tube light flickering overhead? Rank these annoyances from one to ten.
Now flip that list. Your biggest annoyances become your spending priorities. This prevents the classic renovation trap where you overspend on things that didn’t really bother you while running out of budget for what actually matters.
A realistic budget kitchen makeover typically falls into three tiers. Under £200 gets you paint, new handles, and some decorative updates. Between £200 and £500, you can add a backsplash transformation, new lighting, and cabinet hardware upgrades. Above £500 but under £1,000 opens doors to worktop refreshes, new taps, and potentially new cabinet doors for key units. For a comprehensive approach to transforming your entire home on a budget, check out our budget home makeover guide.
Evaluating What Stays and What Goes
Your existing kitchen has hidden potential. Those solid wood cabinets from the 1980s? Structurally superior to most flat-pack options sold today. They just need a fresh face. That laminate worktop with a few scratches? Potentially salvageable with the right treatment or cover-up strategy.
Spend thirty minutes opening every drawer and cabinet. Check hinges. Test handles. Look for structural damage versus cosmetic wear. Anything that functions well but looks tired is a candidate for transformation. Anything actually broken or non-functional goes on the replacement list.
The carcasses of your cabinets, meaning the box structure, rarely need replacing. Doors and drawer fronts are what your eye sees. This distinction alone can save thousands.
Planning and Timeline for Effective Transformation
A weekend warrior approach works brilliantly for budget kitchen makeovers. Friday evening: prep work, taping, cleaning. Saturday: first coats of paint, hardware removal. Sunday: second coats, hardware installation, final touches. Monday morning: you’re sipping coffee in a Transformed space.
More ambitious projects spanning multiple weekends need sequencing. Paint cabinets first since they need drying time between coats. Tackle the backsplash second. Lighting comes last since you need the other elements in place to assess what brightness and placement works best.
Build in a buffer. Paint curing takes longer in humid conditions. That delivery you’re counting on might arrive late. Plan for three weeks but aim for two.
Transforming Your Kitchen with Paint
Refreshing Cabinets and Facades
Nothing delivers more transformation per pound spent than cabinet paint. A £40 tin of quality cabinet paint covers approximately 16 square metres. That’s enough for an average kitchen’s worth of cabinet fronts with room to spare.
The difference between amateur and professional results comes down entirely to preparation. Degrease every surface with sugar soap. Sand with 120-grit paper to create adhesion. Apply a shellac-based primer if you’re painting over lacquered or melamine surfaces. Skip these steps and you’ll have paint peeling within months.
Colour choice matters more than you might think. Sage green, deep navy, and soft white continue dominating in March 2026. But consider your kitchen’s natural light before committing. Dark colours absorb light and can make small kitchens feel cramped. Test patches are non-negotiable. For detailed techniques on diy kitchen cabinet refresh, we’ve created a comprehensive step-by-step resource.
Wall Colours: Trending Shades at Low Cost
Trade paint remains one of the best-kept secrets in budget renovation. The same manufacturer making £52 retail tins sells nearly identical formulations under trade brands for £28. Dulux Trade, Johnstone’s Trade, Crown Trade. Same quality, different tin.
Current kitchen colour trends favour warm neutrals with personality. Warm whites with terracotta undertones. Soft greens reminiscent of herbs. Pale blues that evoke clean, fresh spaces. These work across different cabinet colours and don’t date as quickly as bold statement shades.
One accent wall in a complementary deeper tone can add depth without overwhelming. Behind open shelving works particularly well for this.
Tile Paint: Techniques and Finishes
That dated terracotta or brown tile can absolutely be painted. Specialist tile paint exists for exactly this purpose, though preparation becomes even more critical than with wood surfaces.
Clean tiles with an acid-based cleaner to remove soap scum and limescale. Sugar soap won’t cut it here. Sand lightly with fine grit to remove gloss. Apply primer specifically designed for tiles. Then two coats of tile paint, allowing 16 hours between coats.
Results last three to five years in areas that don’t get direct water contact. Above a splashback zone, expect to touch up periodically. Behind the hob, consider alternative solutions since heat and paint don’t mix well long-term.
DIY Kitchen Cabinet Refresh: Budget-Friendly Techniques
Swapping Handles and Hardware
New handles transform cabinets the way new buttons transform a coat. The proportions look intentional. The whole piece reads as considered rather than neglected.
Measure your existing handle holes before shopping. The distance between screw centres, called the hole spacing, determines compatibility. Standard spacings are 96mm, 128mm, and 160mm. Handles with adjustable spacing exist but cost more and often look less refined.
Brass tones remain popular and complement both warm and cool cabinet colours. Matte black works brilliantly with light cabinets but shows fingerprints. For a softer, Scandinavian look, natural oak handles add unexpected warmth.
Budget tip: eBay and Amazon sell hardware packs significantly cheaper than homeware stores. A 20-pack of quality brass handles runs around £35 online versus £6-8 per handle retail.
Sanding, Preparation and Finishing Facades
The preparation ratio for professional-looking results is 80/20. Eighty percent prep, twenty percent actual painting. Tempting as it is to rush, resist.
Remove doors and drawers completely. Paint them flat, not vertical, to prevent drips. Use a foam roller for large surfaces and a quality brush for edges. Two thin coats always outperform one thick coat. Thin coats dry faster, level better, and resist chipping.
Sand lightly between coats with 240-grit paper. This creates a mechanical bond between layers. The second coat grips the first rather than sitting on top waiting to peel.
Adding Decorative Mouldings
Flat Shaker-style doors gained popularity because they’re simple to produce. But that simplicity sometimes reads as cheap. Adding a simple moulding frame can elevate basic cabinet doors into something resembling bespoke joinery.
Wooden beading strips cost around £3-5 per two-metre length. Mitre the corners at 45 degrees, attach with wood glue and panel pins, fill any gaps with wood filler, then paint everything the same colour. The shadows created by the moulding add depth and perceived quality.
Consider adding a plate rack section by removing a cabinet door entirely and painting the interior a contrasting colour. Open shelving sections break up wall-to-wall cabinetry and provide display opportunities.
Backsplash and Worktop on a Budget
Budget Alternatives for Countertops
Replacing worktops seems like an obvious upgrade but quickly eats budgets. A standard laminate worktop professionally fitted costs £600-900. Quartz or granite? Triple that.
But alternatives exist. Worktop refinishing kits use epoxy-based coatings to create new surfaces over existing laminate. They’re fiddly to apply and require careful preparation, but results can be impressive at around £80-120 for a complete kitchen. For detailed options on budget kitchen countertop alternatives, we’ve assembled every viable solution.
Contact paper designed for worktops has come a long way. Modern options featuring stone and concrete effects are heat-resistant, waterproof, and convincing enough in photographs to fool most people. Expect to spend £30-50 and replace annually with heavy use.
For the woodworking-inclined, sanding and re-oiling wooden worktops costs virtually nothing beyond sandpaper and oil. The transformation is remarkable and the process meditative.
Cheap Backsplash Ideas: Metro Tiles and Adhesive Options
Metro tiles remain timelessly popular for good reason. They’re cheap, widely available, and complement virtually any kitchen style. Standard white metro tiles cost around £15-20 per square metre. Even a small kitchen needs only 2-3 square metres of backsplash coverage.
Peel-and-stick tile alternatives have improved dramatically. Modern gel-based versions look convincing, withstand heat and moisture, and remove cleanly when you’re ready for something new. They’re perfect for renters or commitment-phobes. Check our comprehensive guide on affordable kitchen backsplash ideas for twenty specific solutions.
For a completely free option, reclaimed materials work brilliantly. Old slate tiles, salvaged wood planks, or collected vintage tiles create unique backsplashes that feel curated rather than budget-constrained.
DIY Installation: Tools and Techniques
Installing real tiles isn’t as intimidating as it seems. You need tile adhesive, a notched spreader, a tile cutter (hire for £15/day), grout, and a grout float. That’s genuinely it.
Start from the centre and work outward. Use tile spacers for consistent grout lines. Let adhesive set fully before grouting. The entire process for a standard backsplash takes four to six hours for a first-timer.
Adhesive tile options take even less time. Most require only a clean, dry surface. Cut with sharp scissors. Apply from the bottom up. Done.
Lighting and Electrics: Maximising Impact
Changing Light Fixtures Without Rewiring
That builder-grade flush mount ceiling light does your kitchen no favours. Swapping it for something with personality takes thirty minutes and requires only a screwdriver, wire strippers, and basic electrical confidence.
Pendant lights over islands or dining areas create focal points. Industrial-style cage pendants cost £20-40 and suit contemporary kitchens. Glass schoolhouse pendants add vintage charm for similar prices. Cluster three smaller pendants rather than one large fixture for visual interest.
No island? No problem. A statement flush mount or semi-flush fixture still Transforms the space. Look for fixtures with fabric shades, exposed bulbs, or interesting metalwork. Avoid anything labelled “contractor pack.”
Under-Cabinet LED Lighting
Under-cabinet lighting might be the single highest-impact electrical change you can make. It illuminates worksurfaces for practical cooking, creates ambience in the evening, and makes your kitchen look professionally designed.
Plug-in LED strip lights avoid electrical work entirely. Run them along the underside of wall cabinets, concealed behind a small lip or trim piece. A 5-metre warm white LED strip costs £15-25 and covers most kitchens. Battery-powered motion-sensing bars work for individual sections and need no installation at all.
Warm white (2700K-3000K) flatters food and skin tones. Cool white (4000K+) feels clinical. Split the difference at 3500K for task-focused areas.
Decorative Pendants and Wall Sconces
Wall sconces flanking a window or framing a range hood add layers of light that single ceiling fixtures can’t achieve. Many sconces now come with plug options, eliminating electrical work.
Consider the overall composition. A pendant over a breakfast bar, under-cabinet strips for tasks, and a decorative sconce near the dining area creates professional lighting design principles at DIY prices.
Accessories and Decor to Complete the Look
Kitchen Textiles: Curtains, Tea Towels, Placemats
Textiles are the finishing layer that tells your eye “this space was designed” rather than “this space was assembled.” Coordinate without matching exactly. A striped tea towel, solid linen napkins, and a patterned roman blind can share a colour palette without looking like a showroom display.
Window treatments matter more in kitchens than people realise. Bare windows read as unfinished. A simple linen cafe curtain costs £20 to make from fabric shop remnants and a tension rod. Roman blinds, roller blinds, or even a simple shelf across the window with plants all complete the visual story.
Plants and Greenery for a Living Kitchen
Potted herbs on the windowsill serve dual purposes. They look intentional and alive while actually being useful. Basil, mint, rosemary, and thyme tolerate kitchen conditions well.
For low-light areas, pothos vines trailing from a high shelf add drama without demanding attention. Snake plants and ZZ plants survive neglect. Groupings of three plants in varying heights look more designed than single specimens scattered randomly.
The colour green specifically affects how we perceive spaces. Even artificial greenery, the quality kind, triggers similar psychological responses to living plants.
Smart Storage and Organisers
Decluttering costs nothing but creates the impression of a larger, more organised kitchen. Edit your worktop display down to the essentials. Kettle, toaster, maybe a knife block. Everything else lives in cupboards.
Drawer organisers, lazy susans for corner cabinets, and shelf risers for inside cupboards make storage functional while hiding the visual chaos. These items typically cost £5-15 each and make daily cooking noticeably more pleasant.
Open shelving displays work best with curated collections. White dishes, glass jars with decanted ingredients, cookbooks with attractive spines. Treat it as a styled photograph rather than general storage.
Complete Kitchen Renovation Under £500: A Full Project
Detailed Budget Breakdown
Here’s exactly how to transform a kitchen for under £500, with real numbers from March 2026 pricing. For an even more detailed walkthrough of this budget tier, see our cheap kitchen renovation under 500 guide.
Cabinet paint and primer: £60. Tile paint for backsplash: £35. Wall paint: £40. New handles (20-pack): £45. Under-cabinet LED strips: £25. New ceiling pendant: £55. Peel-and-stick backsplash accent: £40. Worktop refinishing kit: £95. New tap: £65. Miscellaneous supplies including sandpaper, brushes, tape, and sugar soap: £35. Total: £495.
That covers a full transformation of a medium-sized kitchen with ten to twelve cabinet doors and a standard backsplash area.
Step-by-Step Completion Timeline
Weekend one: Remove all hardware. Degrease and sand cabinet fronts. Apply primer. Let cure. Weekend two: First coat of cabinet paint Saturday, second coat Sunday. Midweek: Handles arrive, let paint cure fully. Weekend three: Paint walls and tiles. Install handles. Add LED strips. Weekend four: Apply worktop treatment. Install new tap if changing. Add accessories and style.
Allow five hours per weekend day, though some sessions finish faster. Cabinet painting takes longest due to drying times between stages.
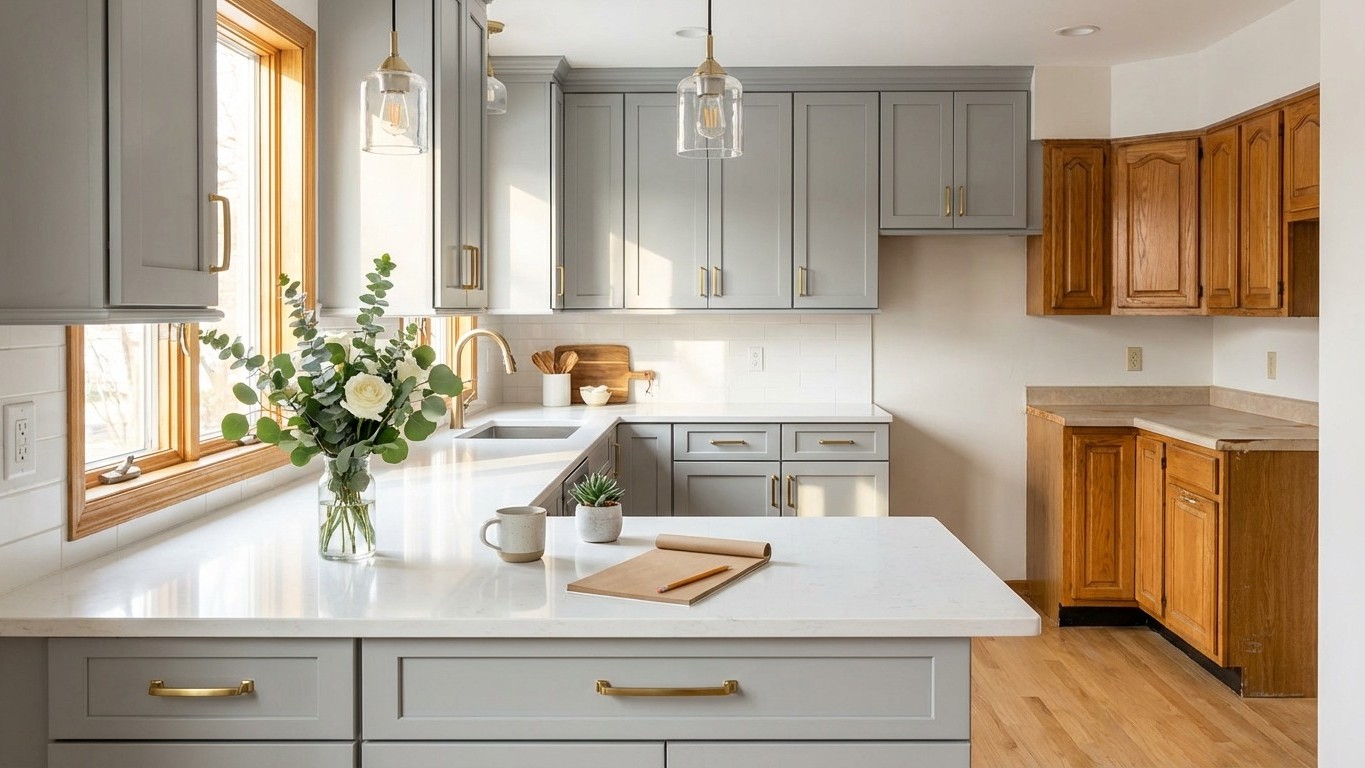
Before and After: Transformation Examples
The psychological impact of these transformations consistently surprises people. Dark oak kitchens become bright, modern spaces. Dated cream melamine transforms into sophisticated grey-green. The bones were always good. The finishes were just tired.
Photography tip for capturing your own transformation: same angle, same time of day, same lighting. The contrast speaks for itself.
Mistakes to Avoid and Professional Tips
Common Budget Pitfalls
Skipping primer ranks as Mistake number one. Paint adhesion on kitchen cabinets depends entirely on proper priming. Without it, expect peeling within six months, especially around handles where fingers create wear.
Buying the cheapest paint seems logical but costs more long-term. Bargain-bin paint requires four coats rather than two, covers less area per tin, and wears faster. Mid-range options from Dulux, Farrow & Ball’s affordable lines, or Zinsser offer the best value per pound.
Changing too much at once leads to decision fatigue and abandoned projects. Better to complete cabinets brilliantly than to have half-painted cabinets, an unfinished backsplash, and chosen-but-not-installed handles sitting in bags.
When to Call a Professional
Gas work is non-negotiable. Never DIY anything gas-related. Qualified Gas Safe engineers exist for a reason.
Electrical work beyond changing like-for-like fixtures technically requires certification. Moving sockets, adding new circuits, or anything in the consumer unit falls under Part P building regulations. Fines for non-compliance exist, and insurance implications are real.
If your cabinets have structural damage, water damage, or pest issues, professional assessment prevents wasting money treating symptoms while causes persist.
Maintaining Your Refreshed Kitchen
Newly painted cabinets need gentle treatment for the first month while paint fully cures. Avoid harsh cleaners, don’t hang heavy items on doors, and wipe spills promptly rather than letting them sit.
Touch-up paint stored in a sealed jar lasts years. When handles start feeling loose, tighten immediately before screws strip. LED strips occasionally need adhesive refreshing after a year or so in humid conditions.
The investment you’ve made deserves protection. Regular cleaning prevents build-up that becomes harder to remove. A quick wipe after cooking prevents grease accumulating on surfaces.
What’s Your Kitchen Telling You?
Every kitchen has potential hiding under dated finishes and tired hardware. The question isn’t whether transformation is possible on a tight budget. The countless successful makeovers prove it absolutely is. The question is what your kitchen specifically needs and how you want to feel walking into it each morning.
Start small if the full project feels overwhelming. Paint one cabinet door and see how it looks. Change four handles and observe the difference. These small tests build confidence for larger transformations.
The kitchen you’ve been dreaming about doesn’t require a second mortgage or months of disruption. It requires a free weekend, a clear plan, and the willingness to pick up a paintbrush. What’s stopping you?