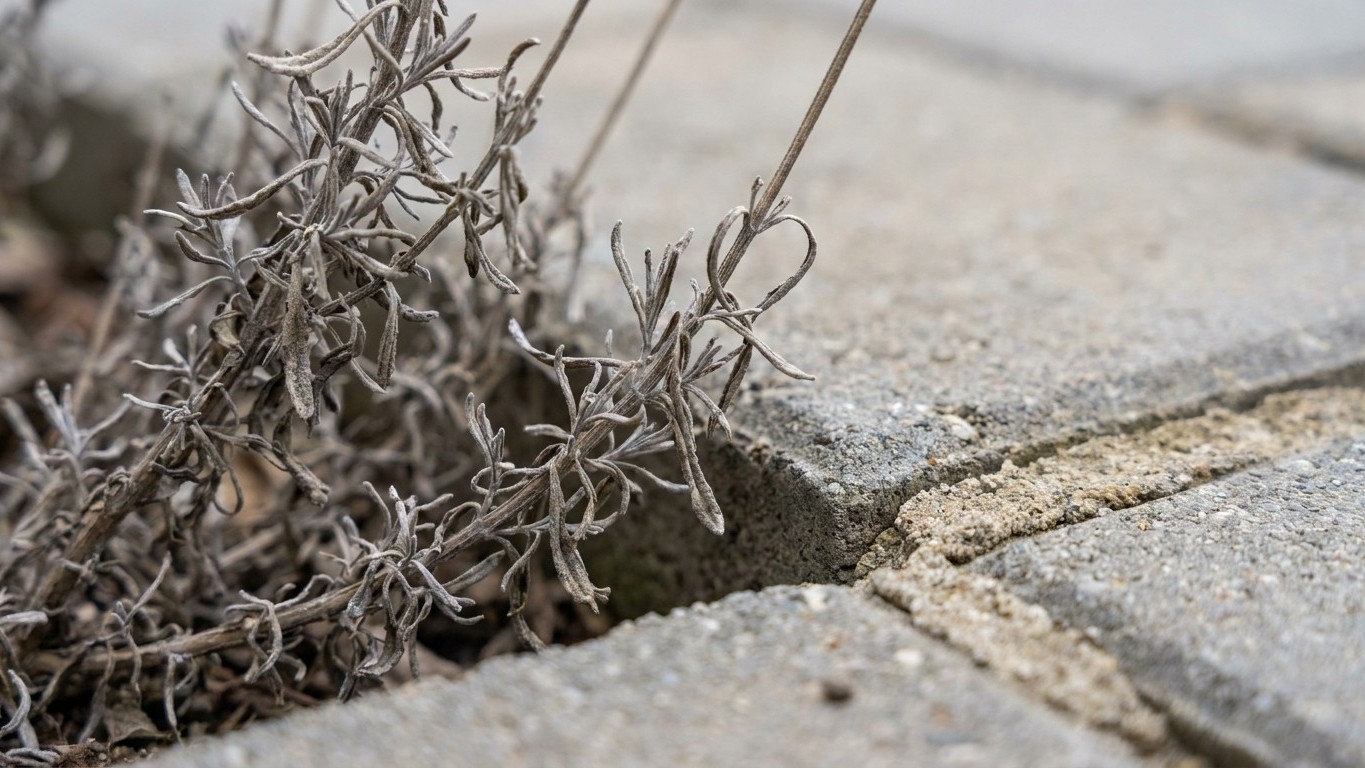
Three seasons. That’s how long it took for a perfectly established lavender border to go gray, then stiff, then dead, not from drought, not from frost, but from the paving right next to it. A neighbor spotted the culprit immediately: cement-based mortar packed into the joints between the slabs, sitting just inches from the roots, silently poisoning the soil every time it rained.
This is more common than most gardeners realize. The connection between paving joints and struggling plants is one of those invisible causes that only becomes obvious once someone points it out.
Key takeaways
- A hidden chemical process is happening right under your feet, poisoning soil near paved borders
- Lavender’s ‘sweet spot’ for pH is dangerously narrow—cement pushes it into the danger zone
- One garden material swap could have prevented the entire problem from the start
The chemistry happening right under your feet
Lime leaching is a process where excess water flows through cementitious materials, usually mortar, dissolving the calcium hydroxide present in the mortar and depositing it onto surrounding surfaces. The same thing happens below the surface, laterally, into the soil of any adjacent border. One common cause of locally alkaline soil is new cement work. Portland cement is lime-based, and lime leaches out of new cement for a while, making the soil close to it alkaline.
Crushed concrete can increase soil pH by 0.5 to 1.5 points due to calcium hydroxide in the cement paste. This happens gradually as water moves through the material and lime leaches into surrounding soil. A traditional sand-and-cement joint mix, re-pointed every few years and constantly exposed to rainfall, behaves the same way. The shift is slow, invisible, and cumulative, exactly the kind of problem that looks like “bad luck” until someone checks the soil.
Concrete does leach lime, and the process is ongoing throughout the lifetime of the concrete structure. How much lime leaching from concrete will affect nearby plants depends on the original soil pH, the plants’ tolerance for pH variation, and how they are fertilized. But the effect of lime leaching from concrete on acid-loving plants is well documented and established and does not necessarily reduce or disappear with time. If anything, after years of rain and freeze-thaw cycles, the leaching can intensify.
Why lavender specifically is so vulnerable
Lavender is often described as tough, forgiving, practically indestructible. And it is, within its preferred conditions. Lavender thrives in slightly alkaline soils with a pH level between 6.5 and 7.5. That sounds like cement runoff should actually help, right? Wrong. While lavender prefers a slightly alkaline environment, excessively high pH levels (above 7.5) can lead to deficiencies in micronutrients like iron and manganese. In either extreme, the plant struggles to absorb what it needs, leading to stunted growth, poor flowering, and increased susceptibility to diseases.
Cement mortar joints don’t stop at 7.5. An alkaline or especially chalky soil will enhance lavender’s fragrance, while any pH below about 6.5 will likely cause lavender plants to be very short-lived. The irony cuts both ways: too acidic and lavender fails, but push past 7.5 toward the 8 or 9 that leaching cement can create, and the result looks identical, a plant that slowly desiccates and dies, roots unable to draw nutrients from increasingly hostile soil. Root rot will make your plant look like it is dried out and dying from underwatering. This is because it affects the roots and kills them, therefore not allowing the plant to take up nutrients and water it needs. Misread that signal, and you water more. Which makes everything worse.
There’s an additional problem: beyond nutrient availability, the correct pH supports beneficial microbial activity in the soil. These microorganisms play a vital role in breaking down organic matter and making nutrients available to plants. A pH outside the optimal range can hinder these microbial communities, further impacting your lavender’s health. The soil isn’t just chemically wrong, it becomes biologically inert.
What you should be using in those joints instead
The good news: the fix doesn’t require ripping up your patio. Polymeric sand is a specialized joint filler that hardens when activated with water, creating a semi-rigid bond between pavers. Unlike traditional cement mortar, the mixture of sand grains and additives forms a powerful binding agent that securely holds concrete pavers and other hardscape materials together. Polymeric sand is also more resistant to erosion, significantly increasing the life expectancy of any installation.
Polymeric sand will allow the joints to expand and contract with the elements like hot sun during the summer and below-freezing temperatures in the winter. It will also bond your pavers together so weeds and insects don’t make their home between each slab or stone. It contains no Portland cement, which means no lime-based compounds slowly leaching sideways into your border soil. For gardens where the joint runs immediately alongside a planting bed, this distinction is the entire ballgame.
Alternatively, consider using permeable jointing compounds, which allow water to drain through while resisting weed growth. These materials reduce the conditions that encourage weeds while maintaining a stable joint structure. Cracks or crumbling grout often occur due to weather fluctuations, outdoor patios experience expansion and contraction with temperature changes, which can stress traditional grout. Older cement-based grouts, in particular, may struggle to withstand these conditions. So switching isn’t just better for your plants; it’s better for the paving itself.
One important caveat with polymeric sand: never install it when it is raining. Rain activates the polymers before the sand is in the joints, which will ruin your hardscape by producing a haze and adhering sand grains to the surface of the pavers. It’s a dry-day job, applied carefully, swept clean before misting.
Testing and recovering your soil
Before replanting anything along a paved border, test the soil. To determine your soil’s current pH, a simple soil test kit, readily available at most garden centers, is invaluable. Once you know your soil’s pH, you can make informed adjustments. If the reading is pushed above 8, the border will need amendment before anything goes back in.
If your soil is too alkaline, you might consider adding sphagnum peat or elemental sulfur to lower the pH, though this is often more challenging to achieve effectively. Repeated applications over a growing season are usually required. More practically, for a narrow border against paving, the most reliable approach is to remove the top 12 inches of affected soil entirely and replace it with a fresh mix. The ideal soil texture for lavender plants is loose, sandy loam which contains large particles for air and water to move through. Mix that with some grit, avoid compost heavy in bark (too acidic if fresh, but pine bark especially), and you give lavender the drainage and chemistry it actually needs.
One small twist worth knowing: if you don’t want to use gravel, you can add a couple of chunks of broken concrete near the base of the plant. The lime leaches out of the concrete and into the soil. So concrete near lavender isn’t automatically the enemy, it’s the uncontrolled, concentrated dose coming from fresh mortar in the joints that tips the balance too far. The difference between a trace and a flood.
Sources : hellogravel.com | goodgrow.uk